How to Build a Website Using WordPress
If you are thinking of building a website for your business or brand without coding experience, then the best option is using WordPress.
Building a website using WordPress is very simple and can be done by anyone without writing any programming code. All you need to know is navigating the platform and doing basic editing.
I can remember how I started my blogging career. In 2021, I wanted to be in the online space as a content writer but had one major limitation: no knowledge of how a website works and how to get one.
I also had no time or available resources to hire a web developer or enrol in any website development courses that would enable me to gain knowledge and build one for myself.
Due to my curiosity, I searched the internet daily, seeking a means of finding a solution to my problem, and luckily, I found an article on how to create a website without any coding experience using WordPress, which I will share with you in this post.
Since then, I have created many websites for myself and many clients and earned massively from doing that.
WordPress is an open-source content management system (CMS) that allows you to build any website by manipulating and changing its code.
In this post, I will work you through the step-by-step procedure on how you can build any WordPress website without coding, so make sure to read till the end.
How To Build A Website Using WordPress
A WordPress website can be built easily by following these simple steps.
1.Get and Register Domain Name.
The first step in creating a website is registering your domain name.
A domain name represents your brand, business, or agency name, and it is what people will type in search engines to see you on the internet. It can also be known as the URL of your Website.
You should choose one that thoroughly reflects your identity and can be easily spelt and recognized by anyone searching for you online. For example, if your name is Kate and you sell clothes (boutique), you can use “Katefashion” to represent your domain name.
The next step is to choose your domain extension. The domain extension is a suffix attached to your domain name to make it visible on the internet; without this, you can not have a visible website.
There are several domain extensions, but the notable ones are the Top Level Domains (TLD), which are .com, .org, .com.ng, .gov.ng, .com.uk, and .ng.
Your choice of domain extension depends primarily on your location, the nature of your business/ brand, and the cost of buying it.
For example, if you own a food website in Nigeria, you can use a .com, .ng or .com.ng domain extension and a .org for the organization or nonprofit and loss websites.
The final step is registering your domain name using a domain and hosting company.
There are a lot of good domain registration companies that can host your Website with ease. Choosing a company to register your domain depends solely on economic cost and location.
After selecting where to register your domain name, you will be mandated to make a purchase using your credit/debit card.
Domain name registration lasts for 1-10 years before it is renewed.
2. Host Your Domain Name
The next step is to host your domain name using the best web hosting provider. A hosting provider serves as a fertile soil for your Website.
For example, if you want to build a house, conceptualize how your dream house will look, and meet an architect to draw the building plan, you will need good land with nice landscaping and topography to erect this structure.
This is what a hosting provider does for you. Hosting your website helps it become visible online, which can be done after buying and registering your domain name.
Good domain hosting also helps to increase your Website’s speed and security and make it more reliable.
Companies like Bluehost, Namecheap and other international and local domain hosting providers can do this for you.
You can host your domain on the same provider where you register it or transfer it to another hosting provider.
Hosting your domain for six to one year is advisable to prevent you from going offline unexpectedly and halting your online activities.
3. Install WordPress
If you have reached this phase, you are halfway to becoming a full-time WordPress developer.
After hosting your domain, the next step is to log in to your cpanel and install WordPress WordPress.
For example, if you use a local hosting company like qserver to host and register your domain, you must first log in to your Cpanel and click on Softaculous by WordPress. This procedure applies to other domain hosting companies.
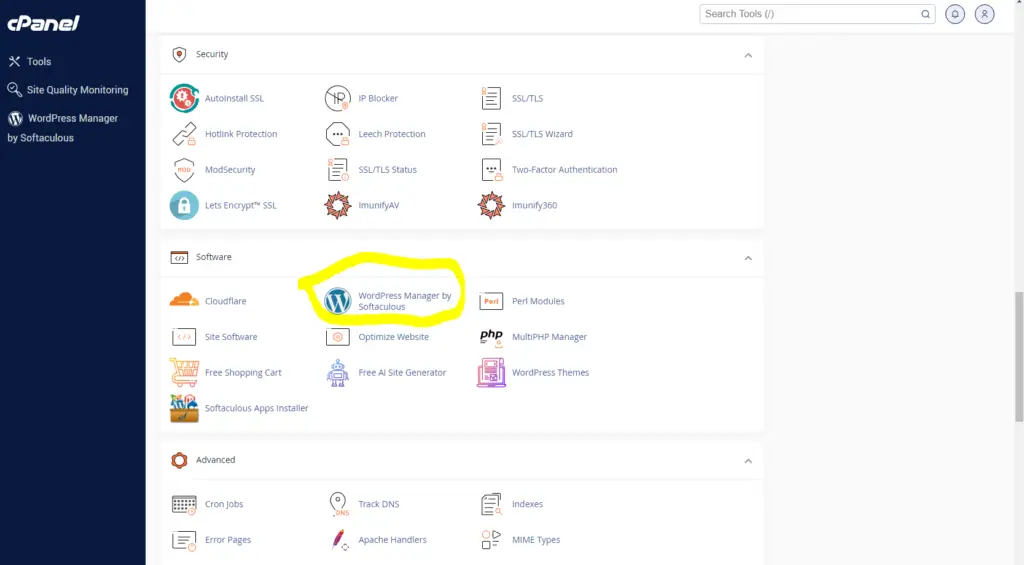
Once this has been done, you will be directed to the WordPress installation page. On the installation page, you will write your website name, tagline and email address and choose a username and password.
Once you are done, click on installation, and your Website is ready for customization.
4. Choose and Install Theme
The Theme gives your WordPress website a unique design by providing a nice font, formatting style, and colour.
Your choice of Theme depends on the kind of Website you want to build. There are thousands of themes available for any website.
Some themes are free, while others are paid versions; as a newbie, you are advised to install light themes like Astra, Kadence or any other free theme compatible with your WordPress website.
To install a theme on your Website, go to Appearance, click on Themes and then click on Add New Theme. You can select from the available ones or search for the time you have in mind from the search bar.
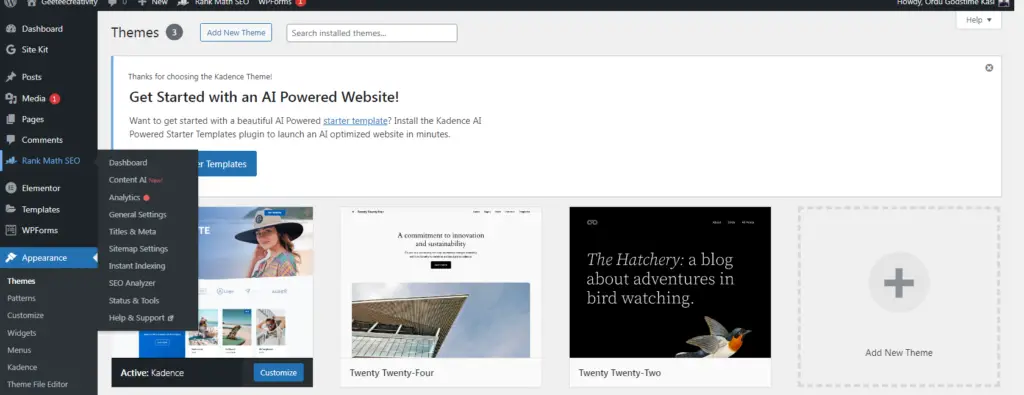
Once you’ve found your perfect Theme, click activate, and it will automatically start working.
5. Add Pages, Categories and Posts
Pages, posts and categories define what you do on your Website and the services you offer. Each of them performs different but interrelated functions.
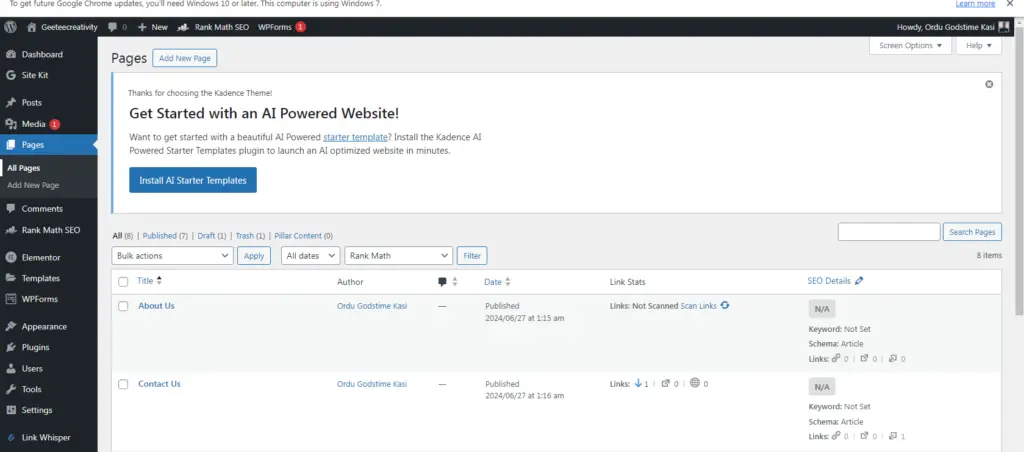
- Pages: Pages display the various sections of your Website and what your Website is all about. Without this, your Website will be blank and empty; some of the popular website pages include the “Contact page”,” About page”, and “Service page”. To add a page to your Website, go to Pages, type your page name and publish.
- Categories: The category is a sub-item contained in the mean page. You are someone who sells different kinds of clothes and has created a product page on your Website; you can decide to split it further by indicating the products for men, women, and children under the product page. To create your categories, click on category, type the name of your category and click on add.
- Posts: Posts are majorly written content on your Website; they include blog posts and articles. To add written content to your Website, click on the post, copy the content from your Google Doc or laptop, and paste it into the blank post box.
6. Create a WordPress Menu
The pages you create without a menu will not be visible on your Website. The menu helps those who visit your Website navigate to different pages.
You need to build two types of menus: the header and the footer menu. The header menu displays your pages at the top of your Website, while the footer displays your pages at the bottom.
To create your Header menu, go to Appearance from your admin dashboard, click on the menu, type in the primary menu as your menu name, and tick primary, secondary and mobile as displayed on the menu interface.
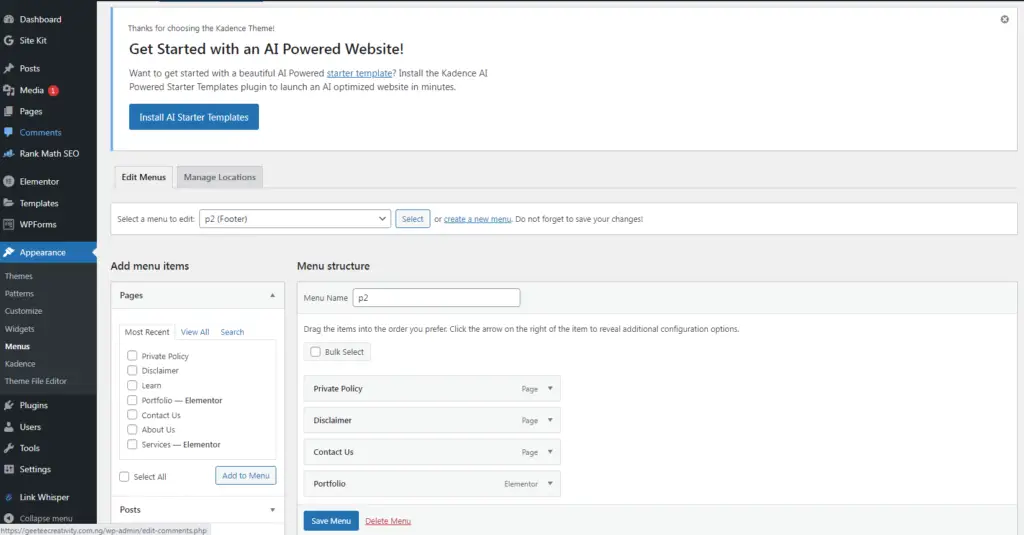
The next step is to drag and drop your created pages and categories from the left-hand side of the menu interface to the primary menu. After that, click on save.
To create your footer menu, click on Create New Menu, type Secondary menu as your menu name and tick only the footer box displayed on your menu interface.
The final step is to drag and drop any created pages to the Secondary Menu, click update, and your footer menu is ready.
7. Install Plugins
Plugins are tailor-made application programs that enable the functionality of your Website.
A certain task can only be performed with a plugin, and most importantly, your Website will not appear on search engines.
Several WordPress plugins work together to make your Website appear good and functional; some are free, while others are paid for.
To install plugins, go to plugins on your dashboard, click on Add new plugins and search for the desired plugins of your choice through the top right search bar; once you’ve seen the plugin, click on Install and activate.
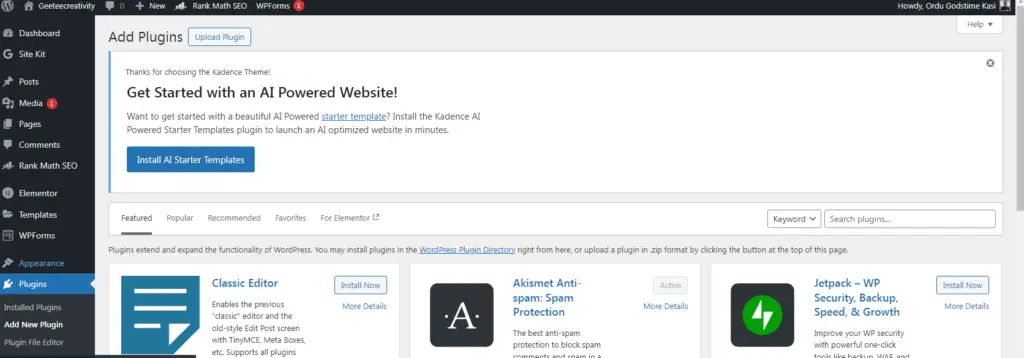
You can also add plugins by uploading them from your laptop to your WordPress dashboard in a zip file.
8. Customize Website
This is the final step in building a website using WordPress. If you’ve gotten to this stage, you are already a WordPress developer.
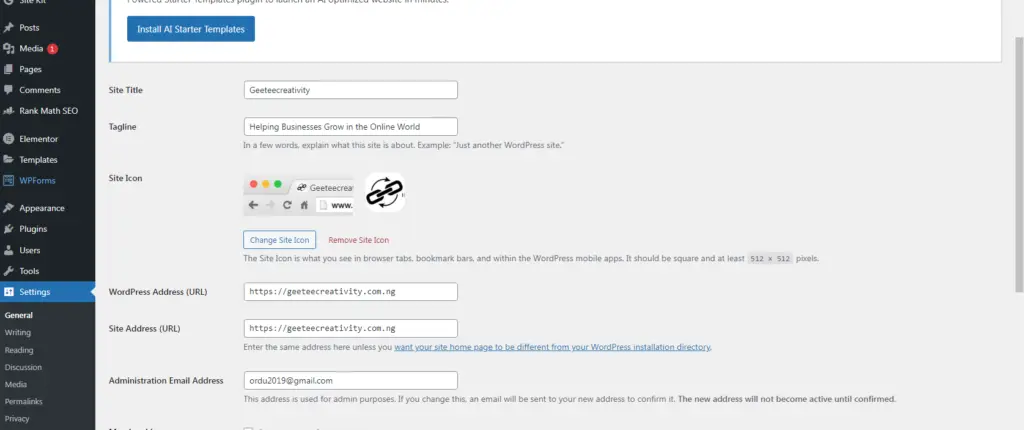
At this stage, you add your site title, icon, and logo, activate the footer page, edit the copyright, add your name and email address, and change the Appearance of your Website’s post.
To Add your site title, name, and email address, click on settings; once this is done, it will display the sub-items ( General, Writing, Reading, Discussion and permalinks), where you can begin your customization one after the other.
To add the site logo and icon, activate the footer page, change the website copyright, remove the theme identity, go to Appearance and click on Customize; once you are done with all of these, click on Publish.
FAQ
Can a beginner build a website using WordPress?
Yes, as a beginner you can build a WordPress website yourself.
How much does it cost to build a WordPress website?
The cost of building a WordPress website depends on the cost of purchasing your domain name and your hosting company.
Do I need the knowledge of any programming language to build a WordPress website?
You don’t need to be a programmer or have any knowledge or experience in any programming language to build a WordPress website.
Final Thought
WordPress is one of the most popular content management systems ( CMS); it has become one of the most popular CMSs, and more than 40% of people use it to build websites daily.
It can be used to design any Website, such as a business website, e-commerce website, courier website, portfolio, blog, etc. When building any of these websites, the principles and steps to follow remain the same.
One good thing about building your Website using WordPress is that it is easy and free to use, SEO friendly, supports all media types and is secure.
Apart from building a WordPress website by having it installed on a third-party platform, you can make it directly by registering and hosting your domain on their official WordPress website.
The above procedures act as a guideline on how you can build a website successfully using WordPress. If you need a practical video tutorial on how this can also be done, fill this form immediately.


5 Comments